


Contact us on 0191 217 0002 today to discuss your project requirements. We are always happy to help.
Top tips for building a garden wall
The Classical Creations guide to building your garden wall
We are all keen to improve the appearance of our homes and hopefully enhance the sale value wherever possible. A simple way to do this is by landscaping your garden and adding a garden wall. They say first impressions last and landscaping is the first thing that potential buyers see, and it reflects well, or poorly, on the other homes in the neighbourhood. Well cut grass, weed free beds and spacious patio areas with good garden furniture all help.
Experts believe that good landscaping can add up to 20% of the value to your home with even small changes to landscaping making a difference. While landscaping alone is not a deciding factor on the value of a property it is a good initial indicator in the level of care an owner takes with their property. Privacy is important and the more the feeling of seclusion, the better for the sale. Adding a garden wall in brick or stone may be more expensive than a simple fence, but it’ll weather attractively and last for a lifetime if done correctly.
With all that I’m mind here is our Classical Creations guide to building your perfect garden wall.
Garden walls serve many other purposes other than security and area great for dividing you garden into different areas. This is especially important to consider if you have children or pets near a busy road. Walls also reduce noise and provide a solid base for both terraced/banked gardens and structures such as pergolas, patios and gazebos. You will need to consider what materials you would like to use and ensure is in keeping with other houses in your area. Brick walls are by far the most popular due to their price, range of colours and ease of construction. Many choose to use second-hand bricks these days, due to their weathered look. While great for blending in with old properties this can be expensive and it is hard to ensure they are always frost resistant. Natural stone walls give a natural, strong and timeless look to a property but can be very expensive. Dry stone effect walls are also proving popular these days, achieving the look and feel of a dry stone wall at a fraction of the price. A good guide is to look at the materials your house is built from, the houses in the area and be realistic with your budget. It is all too easy to underestimate the amount of materials or time needed.

1st – Planning, Planning, Planning – “I love it when a plan comes together”
It is important to fully plan your garden wall before beginning as you will need planning permission for any wall over 1m high if it is on the edge of a public highway and for any free-standing wall over 2m high. Drawing out your plan will help you work out any issues with drainage, underground pipes and cabling for any lights, electric gates or intercom systems for your pillars and gateposts. Once you are confident with your plans you can lay out a full size representation of them onsite with string lines and pegs.
2nd – Do the maths!
Your plan should also help you accurately calculate the correct amount of walling materials required. With bricks this will depend on if you have decided to go for a single skin (half brick wall) or for a one brick thick solid wall. Brick walls are much quicker to construct but you’ll need to be accurate with the number of bricks required. Always allow for some wastage to avoid falling just short on your build. There are some great online tools these days to help you calculate the number of bricks and mortar required to stop you overspending on materials.
3rd – Be prepared
When laying your garden walls foundations it is important to be prepared. Measure out carefully and always double-check your calculations. Plan to lay during a dry spell with no frost. Use string and pegs to lay out your trench. Once dug you can also use wooden pegs as a guide to ensure your concrete is the correct depth and level.
4th – Get it right 1st time!
Mark out the garden walls position with a string line to ensure a perfect front edge to your first course. Make sure to get your mortar mix correct for the type of wall, it should be workable but not runny. Getting the first brick right is important. Start at the first end or corner and ensure is level with a spirit level. Take your time with your first course, as this will affect the whole wall once completed and be sure to avoid mortar on the faces of your bricks. Make sure the first course is completely straight before beginning the second; you may even want to dry-lay the first course to start with. Once done right it you’ll wonder what all the fuss was about and begin laying out the brickwork with ease.
5th – Finish in style
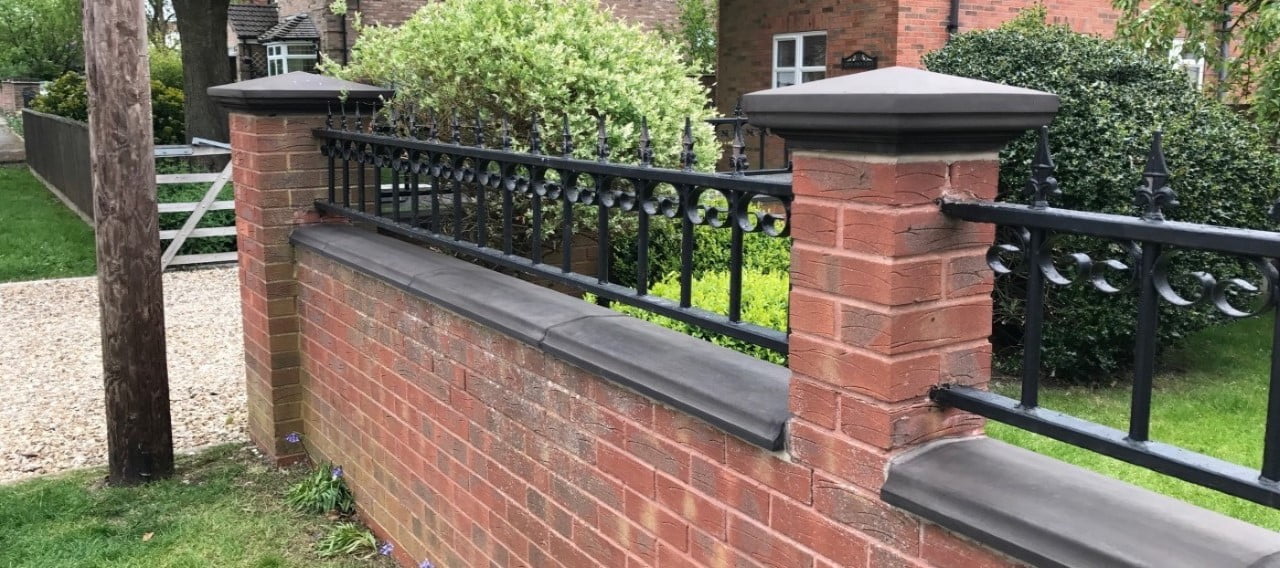
Now all the hard work is done don’t fall at the last hurdle! Use stone caps for your walls, adding some style and elegance to your exterior walls, all while protecting your investment from the rigors of the unpredictable British weather. This can really impact on the overall appearance of your exterior areas. They provide the perfect finishing touch to any outside wall. Providing valuable protection: Exterior walls are at risk of damage, as they are constantly exposed to the elements. The mortar can become damaged as a result of water staining or frost amongst other things, which can eventually pose risks when it comes to the safety of the wall. Capping will help to protect the mortar and your wall from this type of damage, ensuring they continue looking great and are safe.
Choosing the right wall capping product for your garden wall is crucial. That is why at Classical Creations we offer such a huge range of styles, sizes and colours in all our Coping Stones and Pier Caps. We have something for every wall, whether it is for a small traditional rural cottage or a contemporary architectural grand design.
-

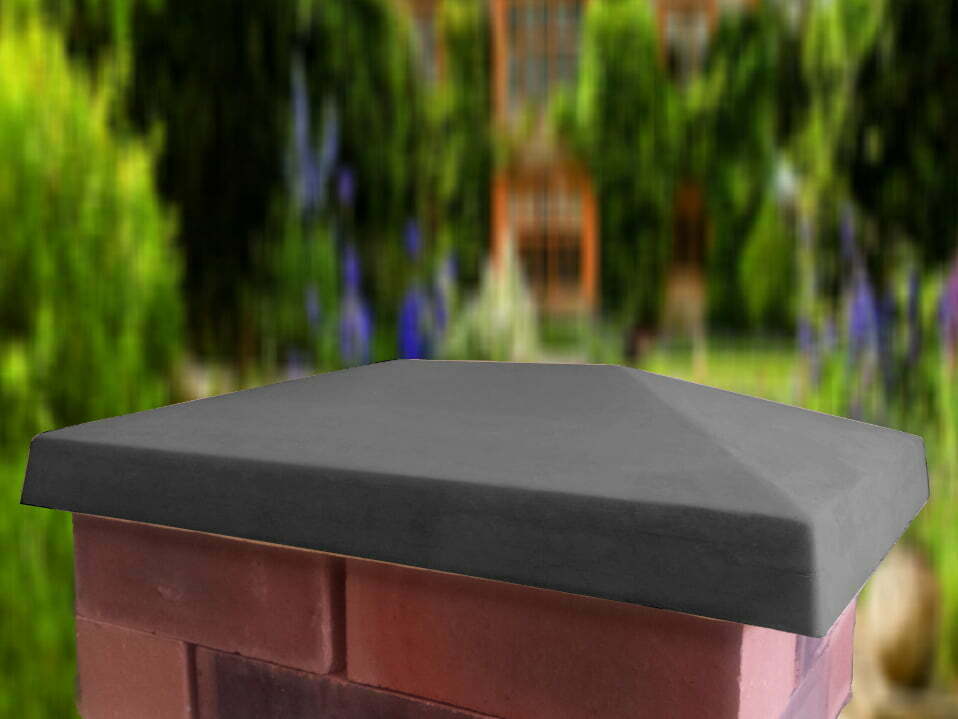
- Twice-Weathered Apex Coping in Grey
-

- Chamfered Flat Coping in Charcoal colour
-

- Cottage Wall Copings are designed to mimic the look of an old Sandstone wall
-

- Charcoal
-

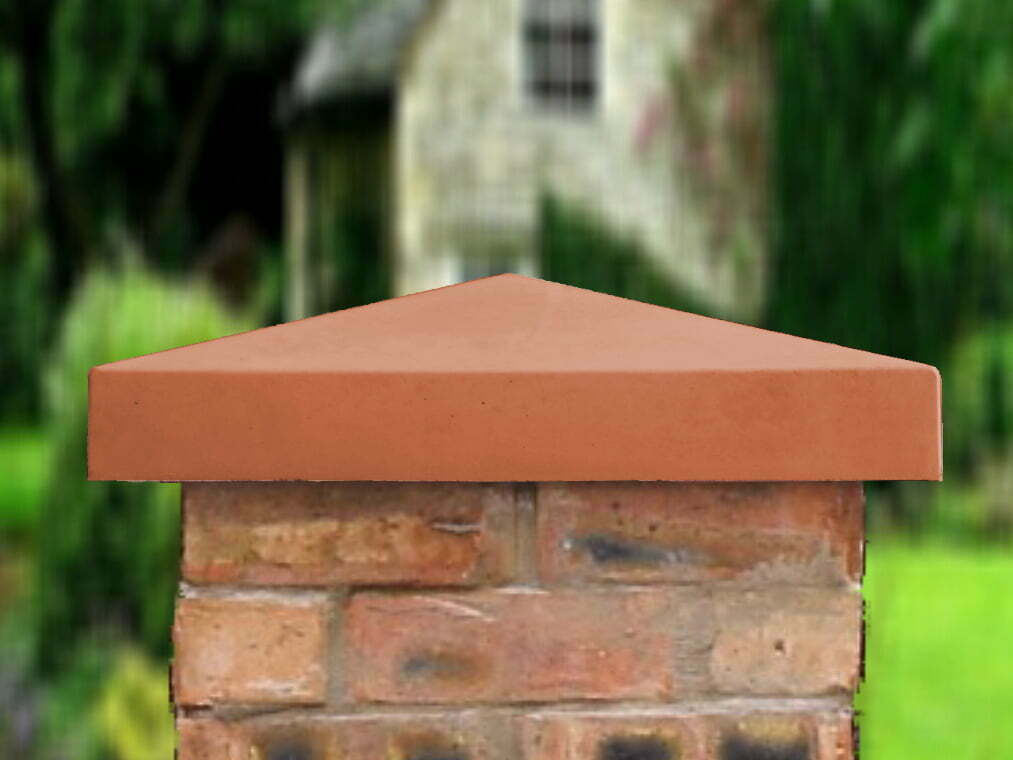
- Terracotta, a stylish look for Victorian terrace houses
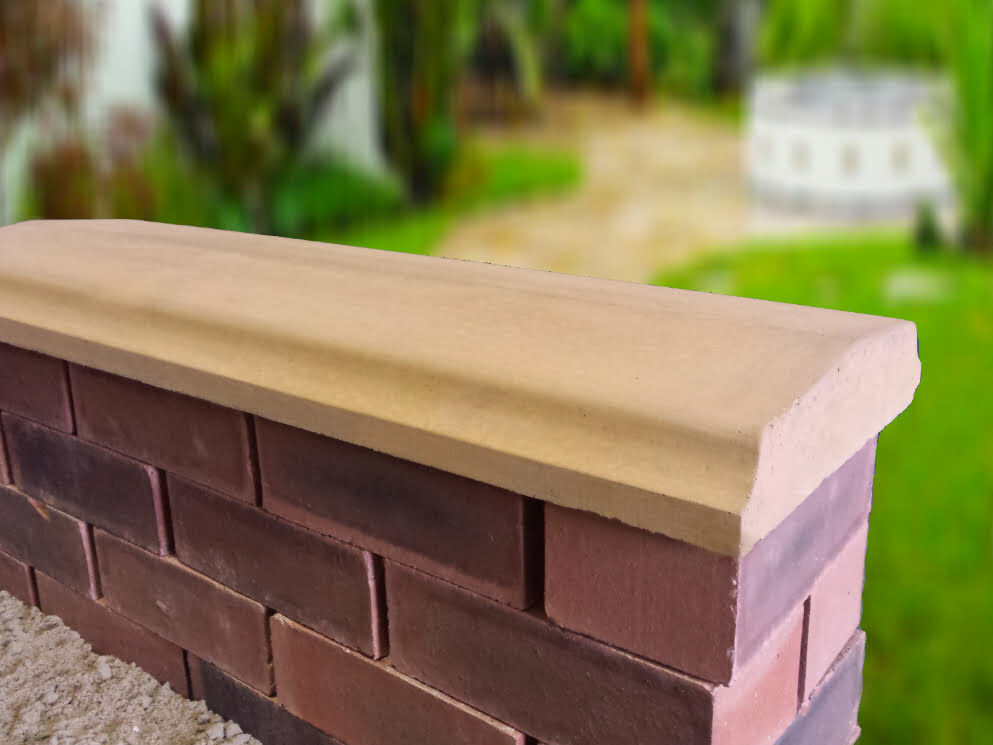
Our simple flat coping gives a very modern, minimalist style providing an ideal finishing touch to your garden wall and offer excellent protection at affordable prices.
Classical Creations Once Weathered Coping range is ideal for use on a wall where it is preferable to control the direction of which the rain water will run off. For example, directing the water towards the guttering on a roof. The term “Once Weathered” means these copings slope only one way allowing the majority of rainwater to flow mainly off one side of the Coping Stones. On request a drip channel can be placed under one side of these Coping Stones to ensure rainwater will not run down the face of your wall.
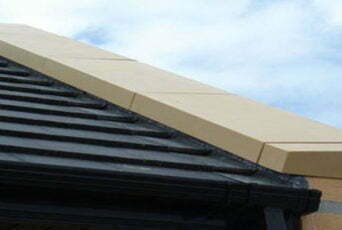
The Twice Weathered Apex Coping is a simple range of coping designed to finish off your garden wall and protect your brickwork from the weather. The term “Twice Weathered” refers to the fact that the copings slope both ways allowing the rainwater to run off either side, similar to a pitched roof on a house.
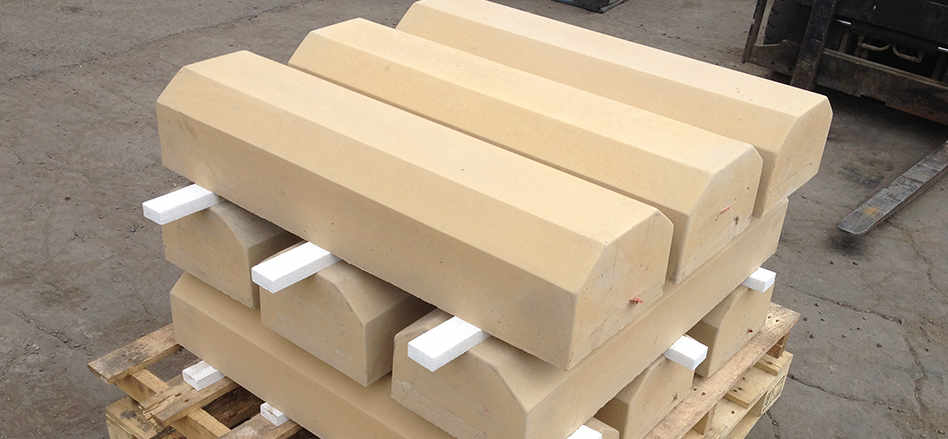
The Twice Weathered Bevelled Copings range is a Deeper, more Ornate version of Coping Stone for your walls. Our Victorian Copings Range is designed to match the old deep Coping Stones that were used on many a house across the UK in the Victorian era.
Our stylish and unique Cottage Wall Copings range is designed to mimic the look of an old Sandstone wall. These are perfect for old houses with garden walls in the many beautiful rural villages across the uk that wish to maintain the look and feel of the surroundings.
Getting the correct Pier Caps for your finished wall is also important. We offer a wide range of high quality Pier Caps at affordable prices. Perfect to provide a finishing touch to a gatepost or pillar and all manufactured here in the UK to the highest standards.
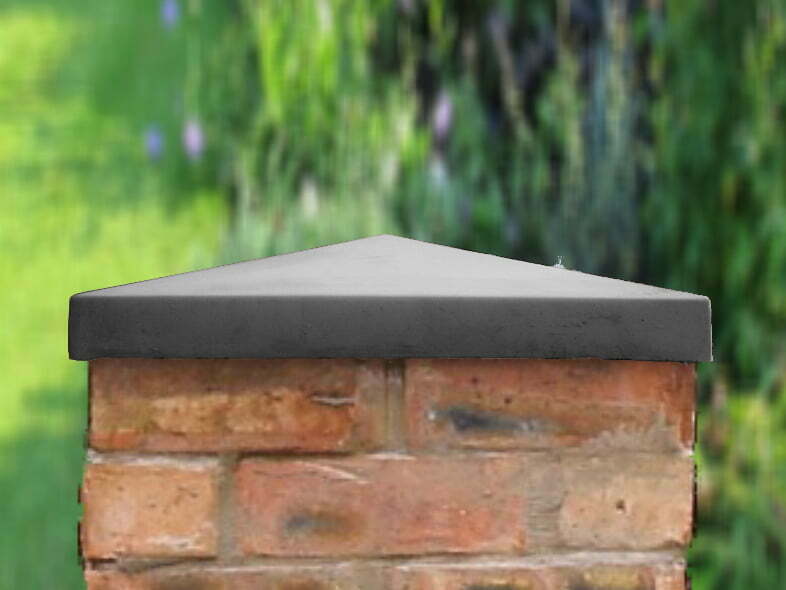
The Standard Range of Apex Pier Caps are great for adding the finishing touch, protecting your brick pillars from the weather in a simple minimalist style. Our pier caps are easy to fit and come in a wide range of colours and sizes.
Our Traditional Pier Caps range is designed with deeper sides that give a more pronounced, fuller look to your brick pillars. They are a modern, minimalistic approach to protecting your Pillars from the Weather. Because of the simple style of these Pier Caps, they can be easily matched up with any choice from our range of Coping Stones.
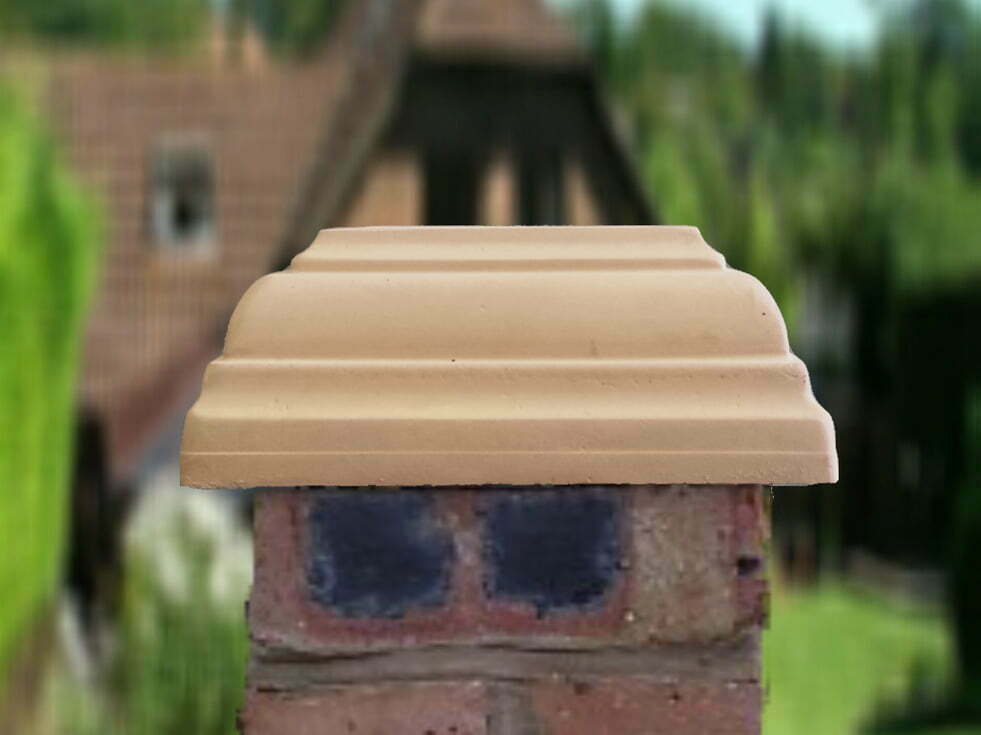
Classical Creations Heritage Tiered Pier Caps range are perfect for adding a high quality and stylish finishing touch. These stunning Heritage Pier Caps come in a wide range of colours and are great to create the perfect entrance and give a grand appearance to your masonry.
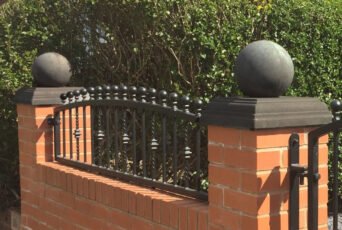
Our Stepped Peak Pier Caps range are a modern twist on a traditional theme. Due to the simplistic geometrics of these Pier Caps they can easily be matched with most of our Coping Stone Range. Many choose to add on a Stepped Flat Pier Caps Sphere to bring a classic traditional English finish to there walls.
-

- Add on a Stepped Flat Pier Caps Sphere
-

- Available in a range of colours
-

- Bring a classic traditional English finish to there walls
-

- Stepped Peak Pier Cap in Sandstone
-
- Traditional Pier Caps range are designed with deeper sides that give a more pronounced, fuller look to your brick pillars
-

- 10 x 15 inch Traditional Pier Cap in Sandstone
-

- Heritage Pier Cap in Terracotta
-

- These stunning tiered Pier Caps come in a wide range of colours and size
-
- Protect your pillar or gatepost
-

- Traditional Pier Cap in Grey
-
- 18″ Traditional Pier Cap in Charcoal
-
- Our pier caps are easy to fit and come in a wide range of colours and sizes
If you would like some advice on which product is best for you we would love to hear from you, please ring us on 0191 217 0002. At Classical Creations we love to help you make an informed choice and have a great team of experts at hand to help assist you with any purchase. We have been manufacturing Pre Cast Concrete products for the Trade and Public since 1996. We pride ourselves on our ability to produce high quality, handmade Pier Caps and Coping Stones that reflect our high standards and attention to detail.
[print-me]
Bespoke
Manufacturing
We can often manufacture Pier Caps and Coping Stones to match your exact specification using our specialist mould making techniques. Contact us today to discuss your project requirements.
Contact Us
Latest News
Keep up to date with all our latest products and masonry advice


Newsletter Sign Up